A lot of production companies and video game development companies design their own in-house software to accommodate their needs, such as Pixar. However, even these studios use publicly accessible software such as After Effects to do things we assume were made on far fancier software.
Here is a video from Adobe's site detailing the use of After Effects as a major editing tool for the movies Iron Man 3 and Oblivion. Its cool to see how within reach the professional level methods and motion graphics are, for those of us advancing our varying levels of motion graphics abilities. (Adobe has some other great videos relating to After Effects and their other products that are worth looking through.)
This is a great website that contains tons of After Effects scripts. These are scripts that have been written by other people and sold online. The scripts vary in price: some free, some expensive, some where you can name your own price and question how much of a cheapskate you are. There are effects like many of the plugins you come across, but many just help with productivity and quickly doing things that would normally eat up time. The scripts and plugins vary in type and program and can be very useful. Check them out when you get a chance. They can inspire ideas, or click in your mind when you see how convenient something can be.
Someone posted this article on Facebook. For people who are just getting into After Effects animation, this can be helpful when designing assets. Photoshop is great for some things but it is raster based meaning things created in it are a set pixel ratio, and scaling it up will reduce the quality. Illustrator is vector based so your images basically have infinite resolution. Because the two programs are both made by Adobe they work very well together, so making adjustments to an imported illustrator asset file, will show up in your After Effects project. Illustrator is also a more advanced tool as far as asset design in many ways, because that is really what it is meant to do, while After Effects is primarily a compositing program. Consider using illustrator to design your assets and export and import them into your After Effects project. Especially for more detailed objects. And check out the article if you want. It just gives some advice on asset creation and proper importing of layers and what not.
Longtime animation tool, Adobe Flash Professional, has been given a new name and a host of new features. The software will now be called Animate CC, and it seems as though Adobe may be trying to compete with more comprehensive animation tools like Toon Boom that have been taking over the world of 2D animation. Here is a list of some of the changes that are coming.
Creative Cloud Libraries
Adobe Stock integration for high-quality images, illustrations, and graphics
TypeKit support for HTML5 Canvas document type
New vector art brushes
Improvements to pencil and art brushes
Brush Library panel
Tagged Swatches
Custom templates for HTML5 Canvas documents
OAM publishing support for AS3, WebGL, and HTML5 Canvas documents
Publish text as outlines in HTML5 Canvas documents
Before this week, I’ve had almost no experience with After Effects and this is something that I would really like to change. I’ve been messing around with a few fun projects as well as watching lots of Video Copilot tutorials this week, and I’m only just starting to get a taste of the really cool things After Effects can do. While watching one of these tutorials, an idea came to me - I should spend a little bit of time each week working on a small, fun side project as a way to track my experience with After Effects. By the end of the semester, I’ll be able to look back and see how my skills have progressed (and probably laugh at how poor my work was at the start). For that reason I’ve uploaded my first animation of this series to Youtube.
My project this week was made on the night of our first class session. It’s simply a solid blue cube changing position, size, and rotation using keyframes. I used the “Easy Ease” option in the Keyframe Assistant to give the the cube more realistic physics, i.e. nonlinear speed (picks up speed gradually and slows down as it approaches the next point). Easy Ease is something that I picked up from Video Copilot, and it was very easy to understand and to use. I think that if I stick with those tutorials, I will be able to learn a lot of useful tips and tricks fairly quickly.
I would like to share a video I found by a motion graphics artist named Nick DenBoer. He has done graphics professionally for a variety of known companies such as Conan, DC, and more. As far as I'm aware, he does much of his stuff in After Effects. As you will see a lot of it is very strange but extremely impressive in my opinion. The video below is a short film/trailer that is going to Sundance and several other festivals. It is called The Chickening. It uses clips entirely from the movie The Shining, but with many, many things added, from face replacements to all kinds of background objects. In this class, I hope to be able to enhance my abilities to anything near this level, and probably to a less disturbing degree. Without further a'do, The Chickening. I'm sorry.
As you can see, his ability to motion track and pretty much seamlessly add objects to a previously shot 2D scene is extremely impressive. I have done work like this in the past but nowhere near as complex on shots that moved as much as these. I look forward to extending my knowledge of After Effects and Mocha motion tracking as well as other similar plugins and programs. Check out his reel if you wish, and here is his YouTube channel.
While considering what movie to place myself in, I've watched a number of YouTube videos of examples and tutorials of others doing so. Here I've found a short tutorial by Tara Arts Entertainment--though quite corky, it is informative and effective.
The man who makes the tutorials on this channel I find to be funny, knowledgeable and easy to follow. All things that make a difference when learning an extensive program like After Effects. The video above covers everything we talked about in class including the green screen, keylight (chroma key effect), in addition to other helpful how-tos like color matching.
Also, I found this quick little video to be something of interest. Here the artist takes a video of himself, then uses rotoscoping to create the outline for his desired animation.
For my next project I'd like to create an opening title sequence for ABC's Once Upon A Time. Currently the show's opening sequences are about 7 seconds in length, simply showcasing the title of the show and along with a mythical creature, person, or item that foreshadows what the current episode is going to be about. The following is a video including Once Upon A Time's episode openings through Season 2:
I'd obviously like to elaborate on this and create a sequence that tells a bit more of the story and includes appropriate credits. The following song is the perfect base to begin animating:
This song, entitles "Henry's Proposal," I think does a great job of communicating the confusion, tentativeness, realization, and excitement that Henry--one of the main characters--finds in unfolding the magical tale that surrounds his life.
We talked about how we are soon going to start to learn about using photos of birds, and animate and composite them in our scene to make them look life its actual video of birds actually moving rather than still images. And also add smoke or any kind of atmosphere to the composition to help blend all of the layers together so that it adds a little extra something to sell the effect.
This made me think of this particular tutorial about Matte paintings. Matte paintings are images that are used to add an element to a scene that otherwise doesn't exist. These are commonly used to extend a set or add things into the background of a scene to help make the world of the story more dynamic.
In this tutorial from Corridor Digital, Niko shows us how to make a mountain appear that doesnt actually exist, using simple photos, some 3D tracking, and adding some atmosphere to help make the mountain look like it actually was there in real life.
This also basically explains how compositing is very important in the animation/visual effects/CG process, as it uses multiple elements/layers and blends them together to make one impressive final result.
So I know this doesn't really have to do with this class but I came across this video the other day on Facebook and I found it interesting and I wanted to share it with you all. As we all probably know, Apple came out with their new iPhone the other day and everyone is freaking out about it. I honestly can't tell you why, it looks like every other iPhone they have come out with. I'm apparently not the only one that thinks that because Jimmy Kimmel decided to prank people and go out into the streets of Hollywood and tell them that the first ever iPhone is the newest one and people believed him. Take a look:
In the video the reporter asks them what they like about it and a lot of them said that it works faster and that the display is more clear. Now I don't know if they were just scrambling for answers or if they truly thought that. Either way, does technology really improve so much that we need to spend hundreds of dollars on the new fad? If everyday people are ignorant enough to think that this is the new iPhone, does it really make a difference? Like with Adobe for example, they come out with a new update every few months and what's the point? It's not like anything is different. I know the answer to this and it's all about money and marketers know that people will eat it all up. It's silly but true. I know I'm one of them!
I was playing around with a number of basic After Affects tutorials the other day when I came across one for kinetic typography. Kinetic typography is when animation is used to express ideas and emotion via text. Above is an outstanding example. It's eye-catching and entertaining.
Adding movable text to something that's usually static is a great way of capturing attention--especially when the message or topic it might be somewhat boring or standard otherwise. It's a fun way to potentially introduce something... Or someone. All of a sudden I've got this great idea for a "welcome to my personal website" type video. How impressive would that "hello" be?
Here is basic tutorial I think a lot can be learned from:
Hey All!
So as I mentioned at the top of the class a few weeks back, I've been working as a freelance animator for the past 3 years. While I'm no where near a professional level I do think I've learned a few things during my time that might be helpful to those who might want to further explore animation as a medium. Here's a little piece that I put together a few years back if you guys want a better sense of the kinds of things I've worked on:
This project took around 30 hours to complete.
The Software
With the exception of some light After Effects work, I animate exclusively in Flash CS3. This version of flash came out a few years ago, but it's one that many animators still use today. It's got everything you need to produce quality animations, and it's got one of the widest library of plugins of any version of flash.
That being said the program is a RAM hungry monster and will very often crash on you without warning. So make sure that whenever your working with flash, you save twice as often as you would in any other program.
The Hardware
As Professor Arturo mentioned earlier, if you're hoping to do any sort of design work you're going to need to get yourself a drawing tablet. I picked up my Wacom Bamboo fun around 4 years ago, and it's still going strong. If the pricetag is above what you're willing to spend then I'd advise working primarily on the Cintiq's in 168, they're top of the line and used by almost every full time animator I know and on top of that they are super cool.
ALSO. While it's not essential for animating, I'd seriously consider purchasing your own condenser microphone. If you;re in a pinch and need to crank out some last minute foley having something like a Blue Snowball mic is incredibly handy.
The Work
There will be a lot of it, it will last forever, and it will be very tedious! However don't let that deter you! Once you get into the swing of things it's actually very relaxing to spend an after noon with a cup of tea, turn your higher functioning off, put on some beegees and let you lizard brain do the work.
The best thing you can do to hone your skills as a novice is practice, but the SECOND best way is to watch tutorials online. Even if you;re only really half paying attention, you can learn a lot about how to better work your work flow when you're able to watch the way others work.
Here is a link to a great set of tutorials I put together a few years back, they're all about flash animation but they're really easy to follow and presented in a beginner friendly way.
That's all I can give you guys for now, but so often I find myself completely changing the way Iwork because of tricks or time saving plugins I've found.
This week we were learning the core basics of how to use After Effects (keyframing, making, creating solid layers, etc.). As the weeks will come, many of us may be getting more and more anxious to do more complex animations. And of course we will be learning new and exciting techniques in class, but if anyone wants to get extra practice with animating and learning how to use After Effects, then Videocopilot.net is definitely something to take a look at!
On this website, Professional VFX artist and motion graphics designer Andrew Kramer has several video tutorials that take you step by step with how to do certain types of animations in After Effects. Watch any of his videos from After Effects 101 basics to how to do advanced 3D motion graphics right in After Effects. If you want to become more and more proficient with After Effects, VideoCopilot is a must!
Also, earlier this week, we were talking about how in this class, we were mostly going to be focusing on After Effects, and not as much on 3D. So that reminded me of this awesome product for After Effects that is absolutely amazing, and it actually comes from the guys at VideoCopilot. It's called Element 3D:
This plugin allows users to more easily integrate 3D models and projects right inside of After Effects. You can import, add texture, material, lighting and more to your 3D models, and even animate right inside of AE, which is pretty remarkable. However it is not a full 3D program like Autodesk Maya, so you cant properly model, rig, or animate certain specific things for your animation, but if you are looking to explore the concepts of 3D as far as lighting and materials work, this tool is absolutely amazing. However, this plugin isn't free, it will cost some money, $200. Then why am I talking about this? The reason is because of how revolutionary it is, and I thought that it was something interesting to share with you all. But the price will obviously shy most of you away from it; however, in my opinion, it is definitely something that I would at least consider looking at and learn about. I actually have it, and it really opens up a new world for me as an After Effects user.
Blending modes are the way that layers can be combined. Usually used when they are overlapping each other, blending modes change the way layers interact with each other. Each blending mode is a different mathematical equation for how colors are combined.
There are 27 blending modes organized into 7 groups:
Normal
Normal
Dissolve
Darken
Darken
Multiply
Color Burn
Linear Burn
Darken Color
Lighten
Lighten
Screen
Color Dodge
Linear Dodge (add)
Lighten Color
Contrast
Overlay
Soft Light
Hard Light
Vivid Light
Linear Light
Pin Light
Hard Mix
Inversion
Difference
Exclusion
Cancelation
Subtract
Divide
Component
Hue
Saturation
Color
Luminosity
Basically, blend modes in the same group do similar things to the way pixels are blended together.
Interesting to note, the Lighten and Darken blend mode groups do the exact opposite option of the other:
I've found a couple of images that help demonstrate different blend modes:
Unfortunately, it's always a challenge to really know how two colors will interact, so my suggestion is to always just keep guessing till it looks right ¯\_(ツ)_/¯
It's just about that time of year again where tv nerds like myself go crazy, NAB. Next week the annual National Association of Broadcasters Show will take place in Las Vegas. This is a massive convention where there are workshops and all the top vendors show off new stuff. One of these vendors will be Adobe who recently announced there will be some major updates to Creative Cloud announced at NAB this year. There will be a live webcast on April 16th but if you can't wait check out this website for more information.
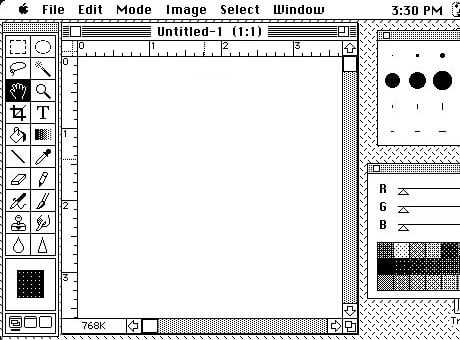
Well, it looks like we messed up and forgot a rather important birthday last week. Last Thursday, Adobe Photoshop celebrated its 25th birthday. Since it's inception back in 1990, Photoshop has become a household name. It has affected every facet of media from tv graphics, to magazines, and even internet memes. It has revolutionized the concept of art.
Adobe released this video celebrating 25 years of Photoshop.
Also, here are some pictures from some earlier versions of the application.
In class we have been getting more and more into animation with After Effects. So far we have completed a cube in 3D space and have learned a few different expressions. By next month we will have our name projects done and will have learned a lot more. As I was looking at various pieces of animation on youtube I came across this short animated by Steve Cutts. It says in his YouTube description that he created this animated short using Adobe Flash and After Effects, two programs that I am familiar with and am currently learning. The short follows the story of a single man, who essentially represents the entire force and motivations of mankind on our planet. As man continues to grow and evolve we continue to push other aspects to the wayside such as the environment and other living creatures. It is a short that depicts the harsh truths of our destruction as mankind, and it does so with a very effective animation.
Adobe Flash is a powerful animation, vector graphic and games/software creating tool. The first version of Flash was created in 1996 by a company called FutureWave Software. It was released as FutureSplash Animator, before it was sold to Macromedia, who released the product as Macromedia Flash.
Flash was widely used on the internet, for many applications such as playing music, games, and video. Flash was used to make many of the 'classic' internet toons we love today, such as That badger thing, The Demented Cartoon movie, and the great Homestar Runner.com
Homestar Runner's creative cast
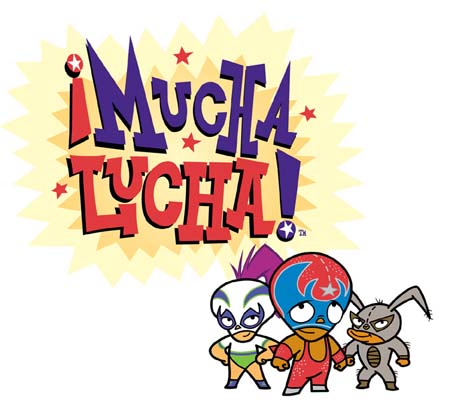
Flash stayed on the internet until 2002, when Warner Bros. Animation debuted the first animated TV show done in Flash: Mucha Lucha
In 2005 Adobe purchased Macromedia, bringing Flash into Adobe's army of creative evil: The Creative Suite.
Next Week: How do Flash do? A look into how Flash works, symbols and actionscript.
Found some tips while I was working on my project. I think the most useful one is pick-whipping the camera to a null object to more easily navigate the camera and focus on what you want. Also includes some useful expressions and fun stuff like that.
Here's the link.
The NAB Tradeshow (National Association of Broadcasters) starts tomorrow, which means that for the past week or so, we've been getting hints of what is to come in After Effects CS7. Here are some of the most exciting features to look forward to.
One of the biggest surprises has been a new level of integration between AE and Cinema 4D. Cinema 4D is a fully featured 3d modeling and rendering system, like Maya or 3DS Max, that has been used in conjunction with After Effects for many years now. However, for the next release, the After Effects team has joined with Maxon to integrate the to programs even more fully. Users will now be able to import projects from Cinema 4D directly to After Effects, without rendering the scene beforehand. This will allow for editing right inside After Effects, and full integration with the built in After Effects cameras. Furthermore, a Lite version of Cinema 4D will be shipped with After Effects.
This is another welcome addition, that continues to push frame by frame rotoscoping into the past. The roto-brush tool, already a tremendous time saver, will now have tools to automatically deal with highly detailed and fuzzy edges, such as hair or leaves. This will be a huge advantage over traditional rotoscoping techniques, as these kinds of edges are where rotoscoping started to break down. In fact, this might be the tool I'm most impatient for. It would have been extremely useful for our last project!
Other Improvements
There is a whole list of smaller things that have been improved, such as the Warp Stabilizer, the addition of snapping in the viewport, a new search feature for missing footage and other media, and optimizations to both the 2d and 3d tracker. Needless to say, After Effects CS7 is looking to be an exciting release, and I'm sure we'll hear of more new features as the release date approaches. You can watch a video demonstrating some of these developments, as well as sneak peeks of other CS products here